Server development
Set up ListenBrainz Server development environment
To contribute to the ListenBrainz project, you need a development environment. With your development environment, you can test your changes before submitting a patch to the project. This guide helps you set up a development environment and run ListenBrainz locally on your workstation. By the end of this guide, you will have…
Installed system dependencies
Registered a MusicBrainz application
Initialized development databases
Running ListenBrainz Server
Clone listenbrainz-server
ListenBrainz is hosted on GitHub at https://github.com/metabrainz/listenbrainz-server/.
You can use git to clone it (or your own fork) to your computer.
Note
Windows users are advised to clone the repository in their WSL2 file system to avoid code watcher issues. Please refer to run docker inside WSL for more information.
git clone https://github.com/metabrainz/listenbrainz-server.git
Install docker
ListenBrainz uses Docker for development. This helps you to easily create your development environment. Therefore, to work on the project, you first need to install Docker. If you haven’t already, follow the docker installation instructions for your platform.
Register a MusicBrainz application
Next, you need to register your application and get an OAuth token from MusicBrainz. This allows you to sign into your development environment with your MusicBrainz account.
To register, visit the MusicBrainz applications page. There, look for the option to register your application. Fill out the form with the following data:
Name: any name that you want and will recognize (e.g.
listenbrainz-server-devel)Description: optional, short description of the application
Homepage:
http://localhost:8100Redirect URI:
http://localhost:8100/login/musicbrainz/post/
After entering this information, you’ll have an OAuth client ID and OAuth client secret. You’ll use these for configuring ListenBrainz.
Update config.py
With your new client ID and secret, update the ListenBrainz configuration file. If this is your first time configuring ListenBrainz, copy the sample to a live configuration.
cp listenbrainz/config.py.sample listenbrainz/config.py
Now, open the new config.py file (don’t change config.py.sample) with your favorite text editor.
Note
If you are accessing your development server using a port other than 8100,
ensure that you update the SERVER_ROOT_URL to reflect the appropriate port number.
If you are accessing your development server using a host other than localhost (e.g., GitHub Codespaces),
ensure that you uncomment and update SERVER_NAME, and ensure SERVER_ROOT_URL is updated
accordingly to maintain consistency and support the appropriate host details.
Next look for this section in the file.
# MusicBrainz OAuth
OAUTH_CLIENT_ID = "CLIENT_ID"
OAUTH_CLIENT_SECRET = "CLIENT_SECRET"
Update the strings with your client ID and secret. After doing this, your ListenBrainz development environment is able to authenticate and log in from your MusicBrainz login.
Note
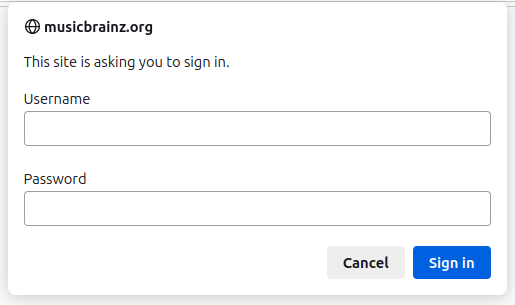
Make sure the OAUTH_CLIENT_ID and OAUTH_CLIENT_SECRET parameters are set properly,
failing to do so will result in a basic browser auth popup like the one below:
To use the Last.fm importer you need an API account at Last.fm. You can
register for one at the Last.fm API page. Look for the following section in config.py.
# Lastfm API
LASTFM_API_URL = "https://ws.audioscrobbler.com/2.0/"
LASTFM_API_KEY = "USE_LASTFM_API_KEY"
Update the LASTFM_API_KEY field with your Last.fm API key.
You also need to update the API_URL field value to http://localhost:8100.
To use the Spotify importer you need to register an application on the
Spotify Developer Dashboard. Use http://127.0.0.1:8100/settings/music-services/spotify/callback/
as the callback URL.
After that, fill out the Spotify client ID and client secret in the following section of the file.
# SPOTIFY
SPOTIFY_CLIENT_ID = ''
SPOTIFY_CLIENT_SECRET = ''
Note
The hostname on the callback URL must be the same as the host you use to
access your development server. If you use something other than localhost, you
should update the SPOTIFY_CALLBACK_URL field accordingly.
To use the CritiqueBrainz reviewer, you’ll need to visit the CritiqueBrainz applications page
and create/register an application. Use http://localhost:8100/ as the homepage URL and http://localhost:8100/settings/music-services/critiquebrainz/callback/
as the callback URL.
After registering, update the CritiqueBrainz section of the file with the client ID and client secret you obtained.
# CRITIQUEBRAINZ
CRITIQUEBRAINZ_CLIENT_ID = ''
CRITIQUEBRAINZ_CLIENT_SECRET = ''
CRITIQUEBRAINZ_REDIRECT_URI = f'{SERVER_ROOT_URL}/settings/music-services/critiquebrainz/callback/'
Note
Again, if you use something other than localhost as the host you use to access your development server,
you should update the homepage and Authorization callback URL fields accordingly when registering on CritiqueBrainz.
To use Funkwhale for music playback and scrobbling, you need to set up the callback URL in the configuration file. Funkwhale uses OAuth for authentication with each Funkwhale instance independently.
# FUNKWHALE
FUNKWHALE_CALLBACK_URL = f'{SERVER_ROOT_URL}/settings/music-services/funkwhale/callback/'
To use Navidrome for music playback, you need to set up an encryption key for securely storing Navidrome passwords. Generate a base64 encoded encryption key and add it to the configuration.
To generate an encryption key, run the following Python command:
python3 -c "from cryptography.fernet import Fernet; print(Fernet.generate_key().decode())"
# NAVIDROME
NAVIDROME_ENCRYPTION_KEY = ""
Update the NAVIDROME_ENCRYPTION_KEY field with the generated key.
Note
The encryption key is used to securely encrypt and decrypt Navidrome passwords stored in the database. Make sure you do not change this key, or you will have to disconnect and reconnect to your Navidrome account.
Initialize ListenBrainz containers
Next, run
./develop.sh build
in the root of the repository. Using docker-compose, this will build multiple
Docker images for the different services that make up the ListenBrainz server.
The first time you run this script it might take some time while it downloads all of the required dependencies and builds the services.
Initialize ListenBrainz databases
Your development environment needs some specific databases to work. Before proceeding, run these commands to initialize the databases.
./develop.sh manage init_db --create-db
./develop.sh manage init_ts_db --create-db
Your development environment is now ready. Now, let’s actually see ListenBrainz load locally!
Run the magic script
Now that the databases are initialized, you can start your development
environment by running develop.sh up.
./develop.sh up
Note
By default, the web service listens on port 8100. If you already have a service listening
on this port, then you can change it by updating the ports section of docker/docker-compose.yml.
ports:
- "8100:80"
To change the listening port, change only the value before the “:” to the port of your choice
and point your browser to http://localhost:<Port>
You will see the output of docker-compose. You can shut down listenbrainz
by pressing CTRL^C. Once everything is running, visit your new site in a browser!
http://localhost:8100
Now, you are all set to begin making changes and seeing them in real-time inside of your development environment. If you make changes to python code, the server will be automatically restarted. If you make changes to javascript code it will be automatically compiled.
Look at the develop.sh documentation for more details.
Listenbrainz containers
A listenbrainz development environment contains a number of different containers running different services. We provide a small description of each container here:
db: A PostgreSQL server that contains data about usersredis: A redis server to store temporary server datatimescale: A PostgreSQL server with the TimescaleDB extension that stores users listensrabbitmq: Used for passing listens between different servicesweb: This is the main ListenBrainz serverapi_compat: A Last.fm-compatible API serverwebsockets: A websocket server used for the user-following and playlist updates on the front-endstatic_builder: A helper service to build Javascript/Typescript and CSS assets if they are changed
Note
If you add new python dependencies to ListenBrainz by adding them to requirements.txt you will have
rebuild the web server. Use
./develop.sh build web
to do this.
If you add new Javascript dependencies you will have to rebuild the static_builder:
./develop.sh build static_builder
Test your changes with unit tests
Unit tests are an important part of ListenBrainz. It helps make it easier for developers to test changes and help prevent easily avoidable mistakes later on. Before committing new code or making a pull request, run the unit tests on your code.
./test.sh
This builds and runs the containers needed for the tests. This script configures test-specific data volumes so that test data is isolated from your development data. Note that all tests are run: Unit tests and integration tests.
To run tests faster, you can use some options to start up the test infrastructure once so that subsequent running of the tests is faster:
./test.sh -u                                 # build unit test containers, start up and initialise the database
./test.sh [path-to-tests-file-or-directory]  # run specific tests, do this as often as you need to
./test.sh -s                                 # stop test containers, but don't remove them
./test.sh -d                                 # stop and remove all test containers
If you made any changes to the frontend, you can run the tests for frontend using
./test.sh fe
You can also make use of the following frontend testing options for efficient testing.
./test.sh fe             run frontend tests
./test.sh fe -u          run frontend tests, update snapshots
./test.sh fe -b          build frontend test containers
./test.sh fe -t          run type-checker
When the tests complete, you will see if your changes are valid or not. These tests are a helpful way to validate new changes without a lot of work.
Lint your code
ListenBrainz uses ESLint to lint the frontend codebase as part of the development process, in Webpack.
ESLint will automatically fix trivial issues and list all other issues in your terminal. Make sure to fix any error with the code you’ve modified.
There can be quite a lot of logs in the terminal, so if you want to look only at front-end build output, you can use this command to inspect only the static_builder logs:
./develop.sh logs -f static_builder
Using develop.sh
We provide a utility to wrap docker-compose and some common development processes.
To open a psql session to the listenbrainz database, run:
./develop.sh psql
To open a psql session to the timescale database containing user listens, run:
./develop.sh timescale
To open a bash shell in the webserver container, run:
./develop.sh bash
To open flask shell in the webserver container using ipython with the listenbrainz app loaded, run:
./develop.sh shell
To open a redis shell:
./develop.sh redis
develop.sh provides a direct interface to invoke manage.py inside a docker container.
manage.py is a click script containing a number of listenbrainz management commands.
To invoke manage.py, run:
./develop.sh manage <command>
To get a list of manage.py commands, run:
./develop.sh manage --help
To pass any other command to docker-compose, run:
./develop.sh <command>
To get a list of valid docker-compose commands, see the output of docker-compose help:
./develop.sh help